31/12/2014

What's On Your Work Desk? Wednesday 291

Well this is the last WOYWW for 2014.  I missed last weeks as I was ill (spent all of Christmas in bed) I had all good intentions of writing a very quick post but it just didn't happen.  To see what WOYWW is all about then pop over to see Julia she'll explain it all over at the Stamping Ground.

So what's on this weeks desk well I can't really share what's on my desk as it's for a magazine article.  I can however show you what I had left on the desk yesterday (and was still there this morning) so technically it still counts right?  This is another painting I started last week.  It's on a much bigger scale than the one I made in the 5x7 journal - very daunting to have all that white space staring at you.  

Well that's it from me short and sweet.  I hope everyone has a wonderful New Years eve and brings in 2015 with a massive flurry of sparkle.

Stage 2 adding colour and details

The beginning- stage 1 

Gelli prints from last week.  The bottom 2 right prints are on Daler Rowney cartridge paper - ghost/clean off pages they always seem to be my favourites.  The other prints are on fusible interfacing.  I used Stewart Gill textile paints.

Happy New Year
Anita

17/12/2014

What's On Your Work Desk? Wednesday #289

Welcome and good evening to another Wednesday WOYWW #289.  What's it all about?  Find out here on Julia's blog the Stamping Ground.

I hope your Wednesday has been brighter than it has been up here.  It's been a day of constant drizzle and rain and today of all days I decided to visit the Christmas market in Manchester.  It was now or never as it ends this weekend.  It was a nice day out just drifting along from one stall to another.  

Anyhow you're not here to read about my day out.  Here is how I left my desk this morning. What you see on the desk is some magnetic backed frames which I bought from Pound World they were a horrible pink colour (see 2nd picture).  I've applied some black gesso to them to which I'm going to add some metallic paint and some of the gems I bought yesterday which are in the round containers sat on top of the wax crayons on the left.  I'm thinking of putting some of my gelli art prints inside them instead of photographs.  


Here are yesterdays bargain buys from the local Pound World in the nail art section they had these pack of gems which you use on your nails but you know what they're also great for your artwork and you can't argue at the price either.  The large pack of crystal gems (540 approx per sheet) I found those in the stationary and craft items.  The packs of coloured gems were off the local market at 50p each.


Thank you for all the visits and I must apologise for not doing many visits last week as it's been a case of making and delivering stock to Authentic and then a day or so later getting a message saying my stock is running low.  Not that I'm complaining.  I'm just over whelmed with how much people are liking my work.  I'll try to do better this week.

Have a wonderful week Anita


15/12/2014

Christmas Card With My Gelli Printing Plate

If you're on twitter and post your work there then you'll know how wide and far your image can travel not just to your followers but to anyone who is on there.  I posted a gelli print I had created and it was picked up by a pen company - Pen Heaven based down in London (follow them on facebook).  Paul came across the twitter picture and was intrigued by the process and asked if I would create a Christmas card which they could use in their 12 day of Christmas project.  So here I am writing this rather long post on a sunny but cold Monday morning.

This tutorial show you how I created my gelli prints using the Gelli Arts printing plate.  There are endless possibilities and and no two will ever be the same.  What I will say is have fun and go with the flow -  slap the paint on if you don't like it wipe it off.  There really is no right or wrong.  This is how I created my print and I know if I do it again I will create something else which will be unique and different. 

I am by no means an expert in fact I would say I am still a novice at the gelli plate.  So why am I doing this tutorial?  Well mainly because I was asked and also to show that you don't have to be an expert to do this type of printing.  I know when I first bought my plate I was intimidated by the whole process and never thought I would like creating in this way.  I'll put my hand up and say I love it and it's not going to be one of those fad buys where you use it for a short time and then it gets left on a shelf somewhere.  

So lets get started - the first image is the card I created and the 2nd is of the print from which it was made from.


Gelli print Christmas Card

Gelli print from which I created the above card

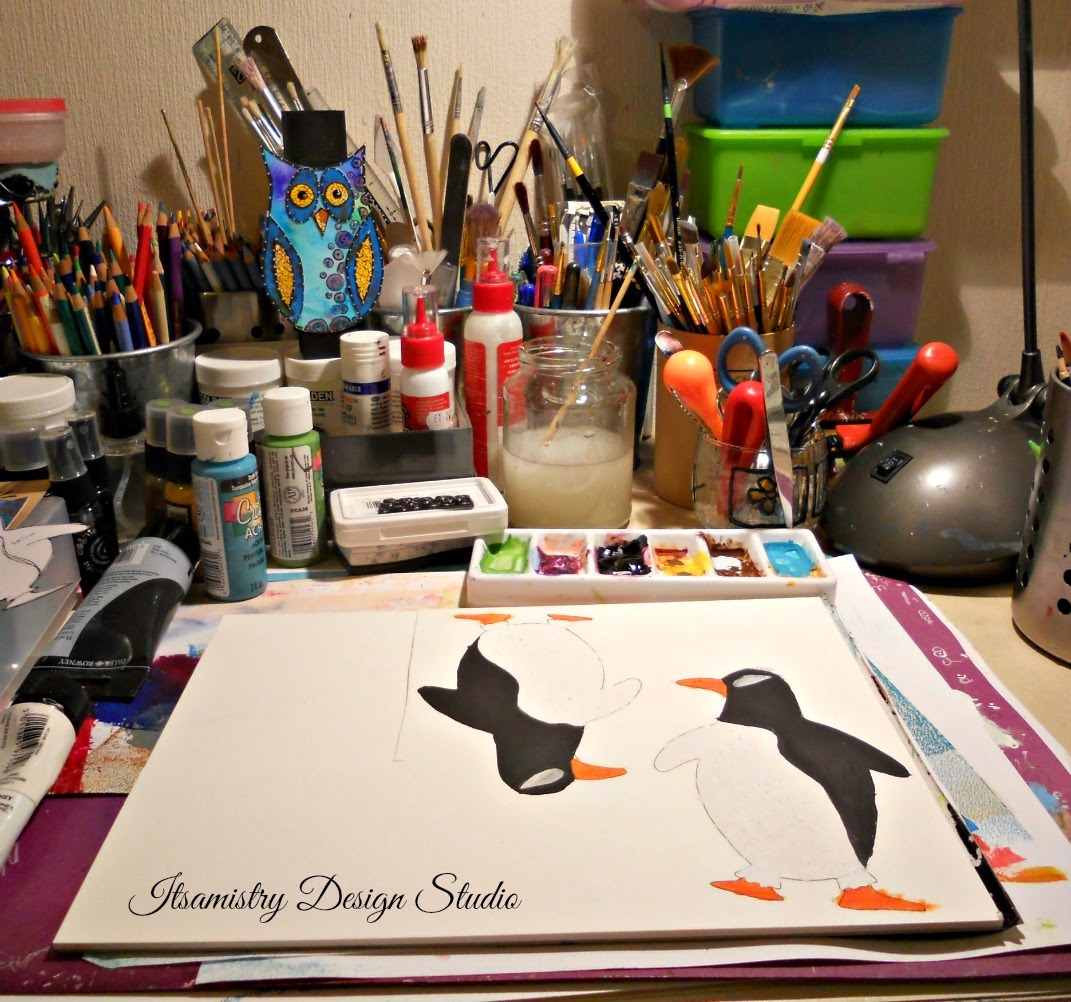
Some of the supplies I used for the card

Gelli plate by GELLI ARTs

1. apply blobs of acrylic paint to the gelli plate
2.using roller spread the paint to create background add paper on top and rub to transfer colour
3. cut triangles to use as a mask
4. apply blobs of colour in lighter tones 

5. spread colour over the plate and masks
6. using the corrugated board, sequin left over and bubble wrap create texture on the painted surface
7.  apply the background paper over and pull 2nd print - let dry
8. using black pen add the outlines and and 'bubbles' 

9. paint the bubbles with the water soluble wax crayons
10. add white swirls over the coloured bubbles and go over the edges with black pen to make the bubbles stand out
11.  crop the image to neaten the edges and add other elements using the black and white pens.
12.  using some left over pieces from another gelli print cut out the trunks of the trees (or you can draw them in)   Apply a thin layer of Golden regular gel - semi gloss - let dry

13. once the gel has dried apply  Golden's clear tar gel to create the bubbles as you can see it's cloudy but will dry clear (you can use any glue which will created a dome diamond glaze/glossy accents)
14 the bubbles will dry clear and give another texture to the artwork.  Now at this point you can cut it down further and create 2 cards or leave it as it is.  

I've left mine as it is for now - the above image shows how it would look if it was mounted and framed.

I hope the above steps have given you a starting point of pulling a gelli print.
There are more detailed and informative videos and tutorials by the lovely people at Gelli Arts. So why not pop on over to their blog website  or facebook page.

Have a fabulous week and enjoy your gelli printing
Anita


10/12/2014

What's On Your Work Desk? Wednesday #288

Good morning time for another WOYWW - go check out Julia's blog the Stamping Ground for all the details.

On my desk this cold Wednesday is a painting or at least my attempt at a painting.  It's at the very early stages where I've added some base colour.  I've never painted dark to light so it will be interesting to see if I can paint this way.  When finished it should be of a traditional Indian woman - well that's what I'm aiming for but we'll see.  As you can see the shading looks a bit dodgy hopefully that will correct itself as I work on it.  

I'm off to put it away for now as I need to make some more cards for the shop. Thank you to everyone who commented on last weeks post and apologies that I couldn't visit as many blogs as I would have liked to - hope to rectify that this week.    


Have a lovely day
Anita

03/12/2014

I'm Late Very Very Late WOYWW #287

I'm running very late with this weeks WOYWW - better late than never right?  Would you believe I've visited 3 different hospitals in one day?  Yup that's right 3 - 1. for my mother's appointment, 2. to pick up mother's letter and 3. bring the father home after nearly 10 weeks in hospital............phew I'm tired from just typing that out.

Anyway this is how I left my desk this afternoon.  I have some work in progress penguins.  They're waiting to be embellished with my favourite rubber stamp (for now anyway) they will be attached to a coordinating clothes peg and will be making their way to a lovely little shop in Uppermill (Saddleworth) to be put on sale.  These 2 are to replace the 2 which were sold recently. 

The owl is going with them.  As you can see he's keeping his beady eye on the penguins as they can get up to mischief - see the last two pictures.

Penguins waiting to be finished off.

Mr Owl keeping his eye on the penguins - wings and eyes are made with my gelli prints.

They started on the wine as friends.....

.....and ended up falling out over chocolate

To find out more about What's on your work desk Wednesday pop over to Julia's blog the Stamping Ground and all will be revealed.

Thank you to everyone who takes the time to leave a comment I really appreciate them and will always reciprocate.

Anita

26/11/2014

What's On Your Work Desk? Wednesday 286

It's a dull grey Wednesday here today but that won't last long as there are many colourful desks to visit - check out Julia's blog over at the Stamping Ground for all the details.

This is how I left my desk last night.  As you can see it's all very nice and clean after my weekends cleaning blitz and not just the table but the whole studio has been cleaned.  The painting on my desk is a gelli print that I pulled some weeks ago.  The print was made with acrylics and I've started to paint it with gouache.  It's still a work in progress as this point.


Gelli print mixed media art

This is the original gelli print

Happy desk hop and thank you for all the visits last week.
Anita

19/11/2014

What's On Your Work Desk Wednesday #285

Goodness I can't believe I haven't blogged since last week - time flies when you're busy having fun creating new items to sell.   Time for WOYWW again and this week on my desk is the finished painting I've made for Flood the Streets with Art  and the usual mish mash of coloured pencils, acrylic paints, brushes and a very dirty jar of water.

Want to know what WOYWW is all about then pop on over to the Stamping Ground where the lovely Julia will explain all.


The finished painting

This is how it would look framed  I'll be leaving it unmounted/framed and let the finder decide what or how they want to display it.

Well I'm off to visit some desks and see what other artists are sharing.
Thank you to everyone who visits mine and takes the time to leave a comment it really is appreciated.

Anita

12/11/2014

What's On Your Work Desk? Wednesday 284

Here we go again with another look at WOYWW - want to know more and how to participate?  Then pop over to the Stamping Ground where Julia will explain all.

My desk this morning consists of a painting I'm trying to finish for the Flood the Street with Art project - find out more about that and how you can take part on the face book page.  This is how I left it last night after adding black outlines around the flowers and painting the cogs green in the center of each flower - they were stenciled in using texture paste.  To the left there is a female figure cut out and painted in black which is now made up into an altered clothes pin (made this morning while my computer had a hissy fit).  Sitting on the handle of the pots at the back you can see the two dress altered clothes pins I made yesterday.


The finished clothes pin "Don't forget me"

That's it from me I'm off to see what everyone has on their desks
Anita

06/11/2014

Art Every Day Month - November Day 6

No I didn't miss a day I just posted on the facebook group yesterday as I'd already had a post up for WOYWW (what's on your work desk Wednesday).

One of my Gelli art prints 

Today I've made some progress on the canvas I'm making for Flood The Street with Art, I've added some texture with stencils and a light texture paste, I've also added some stencil elements with acrylic paint.  A canvas which I'm prepping with colour and I found a page in my altered book where I'd cleaned off my brushes of excess paint and found that there were a couple of shape so I've started to outline them and fill in the spaces for facial features.  I may just have them so they indicate a face - we'll see.

Pages in my altered book - can you see the 3 images on the right hand side page?

Canvas being prepped but not sure what I'll be doing on it yet.

Painting for Flood the streets with Art - texture paste and stencils.  I've also changed the colour of the flowers and lightened the background.

Have fun and if you'd like to join in with Art Every Day Month or Flood the streets with Art then please do pop over and have a look at the details.

Enjoy your evening 
Anita

05/11/2014

What's On Your Work Desk? Wednesday - Gelli Art Prints

It's time for some WOYWW - What's on your work desk Wednesday.  You can read all about it here on Julia's blog the Stamping Ground.

This photograph was taken yesterday (Tuesday) and it's still that way now.  I had an afternoon of painting and pulling prints with my gelli plate.  I only have the one size and it just fits neatly into the space where I make stuff hehehe sounds very techie doesn't it?  But you know what I mean.  I have a large desk but only a small space to create in - nice and cosy.  

Anyway what you can see on my desk are the prints I made using the Gelli art plate.  I'm finding it very addictive and have to be strict with the time I spend with it - it's like having a creative relationship haha.  I've used some of the new goodies I bought from hobby craft on Sunday (I'd only popped in for some white envelopes).  

These prints will be used as part of a Christmas card project I am involved in for a company in London and will be part of a blog post - the 12 days of Christmas.  I'm really drawn towards the print on the right hand side of the photograph.  You can just see the colours on the first print and I've purposely hidden the rest of the image as it was the first one I pulled and I really love how it's turned out and will feature in my little project.

Gelli art prints

My goodies from Sundays visit to Hobby Craft
(the envelopes were on the other table).

Right I'm off to grab a cup of tea and heading over to the Stamping Ground to have a nosey around what everyone else has on their work desks.

Anita


04/11/2014

DIY Washi tape - Art Every Day November

I like washi tape and what you can do with it but I wanted to make my own bespoke tape to match my artwork.  There are plenty of tutorials on You Tube with different ways of making it.  I've used masking tape for mine because that is what I had and didn't want to go and buy anything special just in case I didn't like the way it turned out. 

I didn't want to make a whole real of tape I only wanted enough to have a play with and use on a Christmas card I've designed using stamps from Oak House Studio.  I used a non stick liner to attach the tape to this is about the same size as copy paper and is enough to have play with.  I stuck 3 strips of tape down and painted over them using the last 3 colours you can see in the paint pots in the top picture.  I then used the large snowflake which just fits onto the tape but I wasn't too bothered about getting the whole image on the tape as I stamped it randomly along the middle and the edges.  The second tape I stamped with a couple of the snowflakes and the words 'Let it Snow' along the middle and the last tape I used 3 snowflakes.

On a piece of card I drew some triangles in 2 different sizes, painted and stamped the images in the same colours as the tapes.  Once dry I cut the ones I liked the best and glued them to some turquoise card and cut around them leaving a small frame.  To make the triangles look more like trees I added tree trunks using the same turquoise card cut into squares.

I added the trees to cream card stock - the 2 small trees are glued to the card and the large one is attached with 3D foam to give the image some dimension.    
To finish off I added my DIY washi tape 'Let it Snow' below the trees.  


Three steps to make the 'washi' tape

The trees painted and stamped


The finished card.

That's if from me until tomorrow.  Don't forget to pop over to Art Every Day Month to see how everyone is doing with the challenge
Anita

03/11/2014

Create Art Everyday November Day 3

I haven't worked on my painting today as I've been busy making and writing up a blog post for Oak House Studio where I'm one of the design team members - this is my last month and the theme is winter.  I can't show you the design until after it's been posted on the Oak House Studio blog.

What I have made today that I can share with you is this little pumpkin guy.  This is an ATC (artist trading card) which will be swapped out as part of a trade.  He is made on water colour paper and is painted with acrylics.  The background is made with a rubber stamp - I've randomly coloured in some of the bubbles with acrylic paint.  He'll be off to a new home tomorrow.


I'm linking up with 
Handmade Harbour for Handmade Monday
Claire Justine for Creative Mondays 

Please do pop over to the above blogs as they have some amazing artists who are willing to share their work in blogger land and beyond.
Anita

Oh Happy Happy Post

Don't you just love Happy Post.  I know I do.  Last month I participated in a blog hop where I visited several blogs where the artists blogged about Gelli art prints and how they pulled their prints and used them in their work.  This was organised by Michelle from Shells in the Bush and just for visiting the blogs and leaving a comment on the scheduled days Michelle was giving away a prize and guess who won - yay me.  I absolutely love the gelli print collage painting that Michelle has created with her gelli print art.  The colours are so vibrant and lush.   When I opened the envelope I was only expecting the painting but what I've actually received is 3 pieces of art.  The collage painting, the back of the envelope and the print on the back of the letter - how fabulous and how lucky I feel to receive 3 pieces of original art.  Please do pop over and check out Michelle's blog Shells in the Bush as there is some very lovely art work being shared.
  
The Gelli print collage painting

This was the back of the envelope it arrived in

This was on the back of the letter.

Thank you Michelle I love my painting and the extra prints.
Anita.

02/11/2014

Create Art Every Day November Day 2

So it's day 2 of the create art every day challenge hosted by Leah over at Creative Every Day .  

I've worked a little bit more on the painting I started yesterday for Flood the Street with Art project.  I'm at the messy untidy stage where everything looks flat and has no texture or interesting sections.  I haven't planned this one in how it should look when finished I'm going to let it develop on it's own.  

The messy untidy stage day 2

From Day 1 the start of the painting

Anita

01/11/2014

Create Art Every Day November Day 1

New month, new challenge.  November's challenge is to create art everyday - check out the details here on the Create Every Day blog.  I did this challenge back in May of this year and found it a little difficult to create something new everyday.  So for this months challenge I have decided to work on one piece of art which will eventually be left in a public space to be picked up and taken to a new home as part of "FLOOD the streets with ART".  The day of abandoning the art work is 28th November or as it's known in the USA as Black Friday.  There are nearly 4000 participants from all over the world.

So this is what I have started today and hope to work on everyday and have it finished for the 28th.  It will be a mixed media piece.  The colours aren't quite right as it's more pink than orange but that will probably change as I work on it.  It measures 12 x 9 inches.  


Anita

31/10/2014

YES!!! I Did It - 31 Days of Blogging

Yay!!! I completed #Blogtoberfest14 - 31 blog posts one for each day of October hosted by Shells in the Bush.  I have to admit it wasn't easy some days I struggled with what to post about and if it would be anything that would be of interest.  But I had challenged myself and I did it so I'm going to give myself a pat on the back.

Today I went into Altrincham for the SpookyWoo Spectacular and what a fantastic turn out.  Just walking down George Street there was evidence of little witches and ghouls it was lovely to see people taking part in the event and the enthusiasm of the parents to get involved.  The event was organised and setup by volunteers and they did an amazing job.

Here are some pics from the event 


This was what it was like inside at 3pm and I had to queue up to get in so you can see how busy it was.

Karen Wroe project Director of Art With A Heart  (link to website)- she wasn't sleeping on her feet honest - ohhh just look at that spooky face on the table.

The lovely Bex Wild gallery curator Art With A Heart (link to facebook page)  - I think she rather likes dressing up

Anita
#blogtoberfest14 day 31 the finale.

30/10/2014

Travelling Journal - Live Your Dream

Here is another travelling journal which I have added my art to.  This little lady is hand drawn into the journal page and painted with water colour pencils, water soluble wax crayons a little bit of acrylic paint.  I've added some rubber stamped elements to the page to add some texture and interest to the background.  I like her dreamy look and the words "Live Your Dream" seemed appropriate.  I haven't drawn a face in ages so I'm really pleased with the way she's come out.  I'm also not very good with water colours due to the nature of them. 


Anita
#blogtoberfest14 day 30

29/10/2014

What's On Your Work Desk? Wednesday #282

On my work desk this morning is a big box of embroidery threads with which I have started to stitch my textile artist trading card with.  I need to get this finished for the end of this week so I can send it off to it's new home.  I host an ATC - artist trading card swap every month for the gallery I volunteer at Art With A Heart and one of the players Ottilia-Bogdan Cormos this month has made an ATC on perspex and I loved it so much that I asked for a personal trade and she very kindly agreed and sent me this totally gorgeous ATC - the theme for the swap was Halloween or autumn.

Here is the ATC that Ottilia sent to me - isn't it gorgeous?  The colours are so vibrant.

And here is my desk as it stands today.

Want to know more about What's on your work desk Wednesday?  Then pop over to Julia's blog The Stamping Ground for the details and to see what the other artists are sharing on their desks.

Anita
#blogtoberfest14 day 29
I'm also linking up with Claire Justine for the Wednesday blog hop