Showing posts with label tags. Show all posts

21/09/2014

TAg YoU'rE IT Tutorial- Handmade Monday

Hello everyone hope you've had a wonderful weekend. The weather has been kind to us here in the UK and it stayed dry for the Walk of Hope stroll around Tatton Park yesterday for The Christie Hospital -you can see a pic here

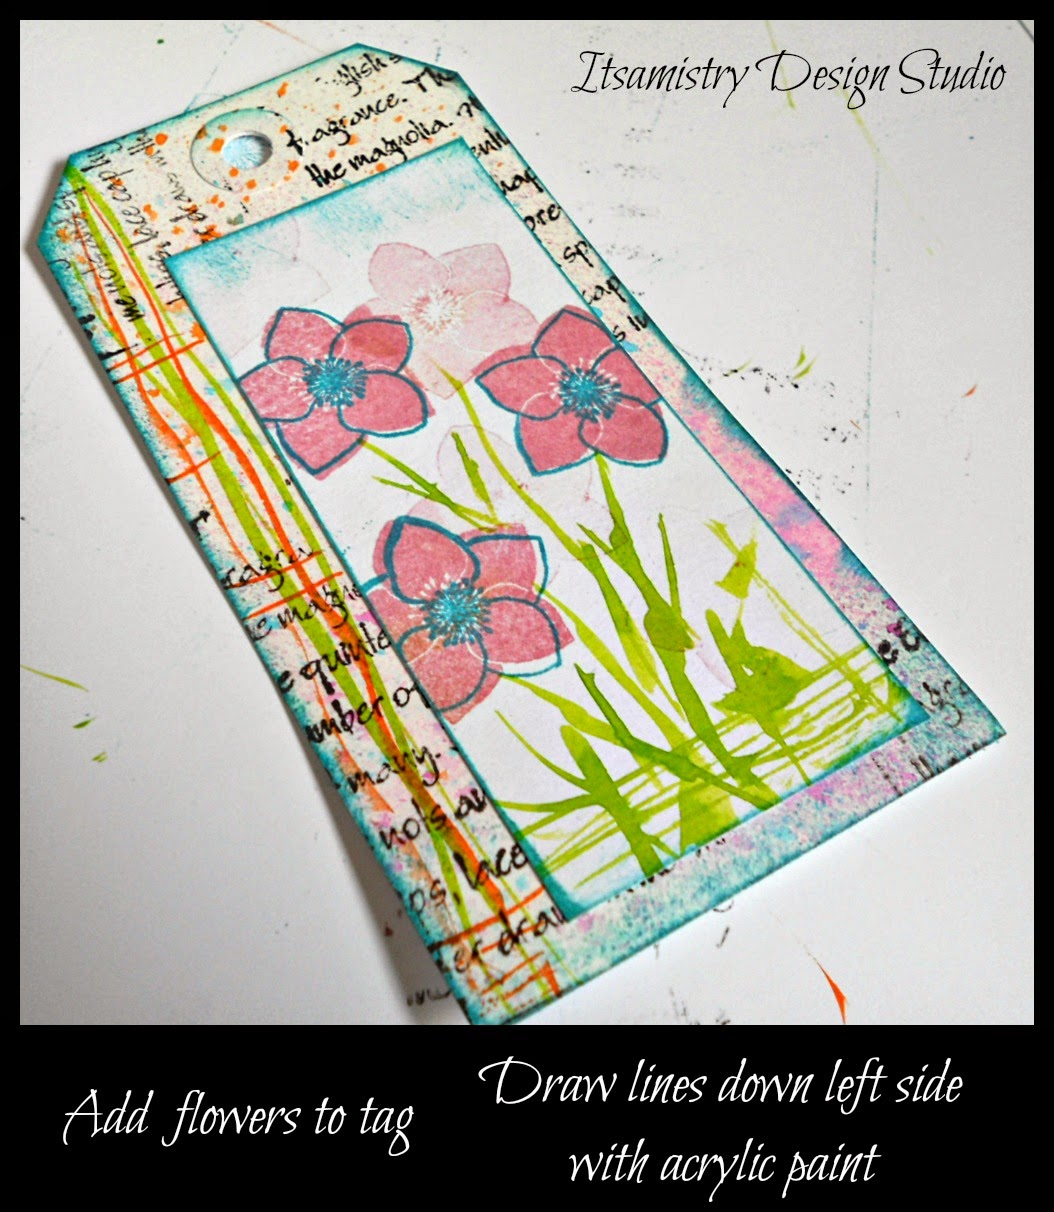
Today I've been playing with some floral stamps from Oak House Studio.  The stamp is part of the Big Christmas collection and is proving to be one of my favourites - there is a positive and negative so great for creating different textures.  All the products I've used in this tutorial are available from Oak House Studio (ribbon and gems are from my stash).

I've made a step by step tutorial if you fancy having a go at making these tags. 

So here goes - 

1.  Gather all your ingredients.  


2. Apply spray inks in your colour choice - I've used citrus orange, totally turquoise and regal claret. Randomly stamp the text with black ink and add ink around the edge of the tag with the sea blue ink pad - just run the ink pad directly onto the edge using a gentle stroke.  Put to one side.


3. Cut a piece of card which is smaller than the tag.  Stamp the solid flower using the dusky pink ink pad and then the outline stamp with the sea blue.  You'll notice that there are a few lighter solid flowers - I stamped these after the initial flowers had been stamped and there is usually a little bit of ink still on the stamp (no point wasting the ink right?).  Add a border again using the sea blue ink pad as in the previous step.


4.  Next we need to add the leaves.  Here I've used the Oak House Studios acrylic inks and a nail art brush (which you can get from Poundland yep you read that right :) )  Dipping the brush lightly and making sure you don't have too much ink on the brush all you need to do is gently stroke the brush in the areas where you want grass/stems and leaves.  You don't have to be too neat to do this.


5.  Glue the smaller stamped card onto the tag (on this one I've glued it off center and to the right.  I've added a few lines of acrylic ink along the left side of the tag using peridot and amber inks with the nail art brush.

6.  I finished off the tags with some ribbon and gems which I added to the middle of the flowers.


Here are a couple of cards I made using the same flower stamp.


I hope you've enjoyed the tutorial - You can find the stamps here
and the ink pads, sprays and acrylic inks here  

I'm linking up with the Handmade Harbour for Handmade Monday and Creatives Mondays 

Happy Crafting
Anita

02/12/2013

How to make bookmarks or gift tags from scraps of paper


Gather your ingredients - scraps of paper, glue and a sheet of card to stick your scraps onto.  I used an A3 size card you can use A4 which is what most crafters have in their stash of cards.

This is what I call the "eww" stage because it looks like a 5 year old's work.

Next start adding paint - I used acrylic paint and added it using a crumpled up piece of bubble wrap - randomly.  You can use anything you like to paint with fingers, crumpled up paper towels, an old credit card etc.  

I then used a stencil with white acrylic paint to sections of the background.

  Over this I added spots of gel medium (with my fingers) and sprinkled some embossing powder (the turquoise bits) into it and heated it with a heat gun - on top of this I did the same again but this time I added some gold embossing powder.  

I also added some fibres which added texture but lost its sheen as I went over it with paint and glue - so you may want to leave it out or add it at the end.


These 2 pictures show a close up of the embossing powder and the texture it creates.  The more I heated it the bubblier it got - just make sure you have a good ventilated room - embossing powder is meant to be used with embossing pads to adhere the embossing powder but I like to experiment and gel medium worked really well (didn't give off any smell but just to err on the side of caution make sure you don't over heat it).

After the background has dried you can cut them to any size you want.  I cut mine to 12cm by 6cm.  I then mounted these onto coordinating card and cut around them so the clean card showed around the edges - you don't have to do this I just think it finishes the tags/bookmarks off and it covers the back of the original background - mine got glue and paint in parts.

Now you don't have to do this stage but I added some embellishments just to make them that more interesting and unique.  I used some odds and ends I've had in my collection box - you can use images out of magazines, text from newspapers in fact anything you like. 

To finish off I punched a hole at the top and added some fibres.

I hope you enjoy the tutorial.
Anita

27/11/2013

It's Party Time Over At Handmade Harbour

It's time to get the party started (isn't that a line from a song?).  Anyway, it's that time of the week and we're partying over at Handmade Harbour so lets get our lovely sparkly outfits out and dance the night away..............well okay may be not quite so early.  I don't know about you but I'm so not prepared for Christmas.  I bought a couple of presents while I was out on Monday at the Christmas Market in Manchester so that's a start.  I finish work in a couple of weeks so I'll probably do most of it then.  

Have you started on your Christmas card making yet?  I know some people start theirs in January I think I'd probably forget where I'd put them if I started that early and everyone who knows me will think I'm not well :)

Well here are 2 different cards for the Papercraft Party over at Handmade Harbour.  I hope you like them and feel inspired to create your own cards with Wendy's lovely designs.  If you fancy joining in with the challenge and win yourself some digi stamps and a lovely badge to put on your blog all you have to do is create a card using one of Wendy's designs (not compulsory - although how can you resist some of the free digi stamps to wet your appetite?  

Whatever you decide to do I hope you have a lovely week.


You can find all the Christmas stamps here
If you fancy having a play with digi stamps you can find a couple of free images here

I do hope you'll join in the fun.
Anita


30/10/2013

Penguin Love Balancing Act.............Midweek Papercraft Party

Okay so it's nearly November just a day to go so I don't feel so guilty in saying the "C" word...............Christmas yay it's nearly here.  I love this time of year (apart from the cold weather and dark nights).  I love all the lights that go up around the cities and towns to make the market areas look festive and bright.  The walk around the Christmas market in Manchester and locally perusing the handmade gifts that are on sale -maybe partaking of some mulled wine or a glass of warm fruit cider.  Have I got you looking forward to Christmas yet?  

If the above hasn't then maybe my little penguin friend here delivering some presents will.

The image is from Handmade Harbour and is a new Digi Stamp #231 Penguin with Presents isn't he cute?  I've also used the #226 Christmas tags and Sentiments and the parcels on the bottom of the card are from #189 Birds and Gifts set of 10 images.  I think he can be used for a number of occasions not just Christmas.


18/10/2011

Cupcake Cookie Tags

A few months ago I was commissioned to make some tags for a bride who was having cookies made for her guests.  The spec was that they were to be vintage style & colours.  The tags were attached to the cookies which were then put into containers on the tables.  I don't have any photos of them insitu but here are the pictures I took before I sent them off - 


This is the lovely email I received from the couple -


Anita 
Well, what can I say. Amazing, amazing, amazing......


The cakes and cookies went down a storm and the guests absolutely loved their name tags on the cookies. It was such a special and personal touch.

I cannot thank you enough for your help.

Carla & Mark.