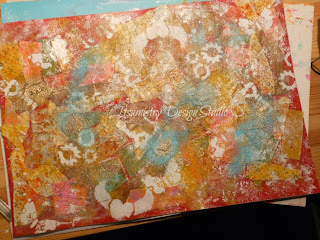
Gather your ingredients - scraps of paper, glue and a sheet of card to stick your scraps onto. I used an A3 size card you can use A4 which is what most crafters have in their stash of cards.
This is what I call the "eww" stage because it looks like a 5 year old's work.
Next start adding paint - I used acrylic paint and added it using a crumpled up piece of bubble wrap - randomly. You can use anything you like to paint with fingers, crumpled up paper towels, an old credit card etc.
I then used a stencil with white acrylic paint to sections of the background.
Over this I added spots of gel medium (with my fingers) and sprinkled some embossing powder (the turquoise bits) into it and heated it with a heat gun - on top of this I did the same again but this time I added some gold embossing powder.
I also added some fibres which added texture but lost its sheen as I went over it with paint and glue - so you may want to leave it out or add it at the end.
These 2 pictures show a close up of the embossing powder and the texture it creates. The more I heated it the bubblier it got - just make sure you have a good ventilated room - embossing powder is meant to be used with embossing pads to adhere the embossing powder but I like to experiment and gel medium worked really well (didn't give off any smell but just to err on the side of caution make sure you don't over heat it).
After the background has dried you can cut them to any size you want. I cut mine to 12cm by 6cm. I then mounted these onto coordinating card and cut around them so the clean card showed around the edges - you don't have to do this I just think it finishes the tags/bookmarks off and it covers the back of the original background - mine got glue and paint in parts.
Now you don't have to do this stage but I added some embellishments just to make them that more interesting and unique. I used some odds and ends I've had in my collection box - you can use images out of magazines, text from newspapers in fact anything you like.
To finish off I punched a hole at the top and added some fibres.
I hope you enjoy the tutorial.
Anita


8 comments:
Gorgeous Anita. You should submit it to tTotally Tutorials!
Thank you Laura I'll have a look into it this evening.
Totally gorgeous - thanks for the tutorial xXx
I love this - I have made cards but not done anything like this. It's now on my list! I have tons of fibres from sewing which could be incorporated possibly!
Oh yes that would be a great way to use up fibres and nothing to stop you from making fabric bookmarks.
These are really beautiful! They have a lovely sort of faded elegance to them but with added magic.
Anita,
Yes I did enjoy your tut! you are very clever and talented! I have signed up to follow you by email and by the other way, where my picture is. Makes me want to go play now!
Peace,
Kristy
I love these! They look really unique!
Post a Comment